

How To Install Herringbone Backsplash Sheets
Last Updated on Feb 26, 2022 by
I got a very late offset on the kitchen yesterday, and so I didn't get as far on the herringbone tile backsplash as I had hoped. Only things are moving correct along! So I thought I would take this chance to answer some questions I've been getting about tiling in full general, tiling a herringbone backsplash, what kind of tile saw I have, etc.
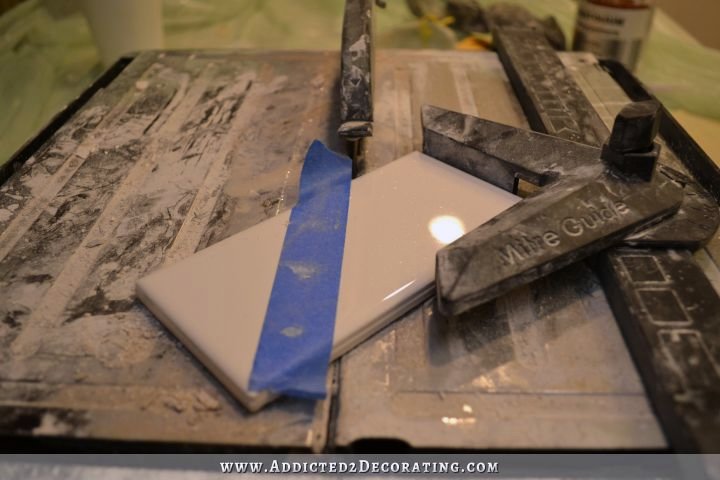
Here is my fancy tile saw. 😀
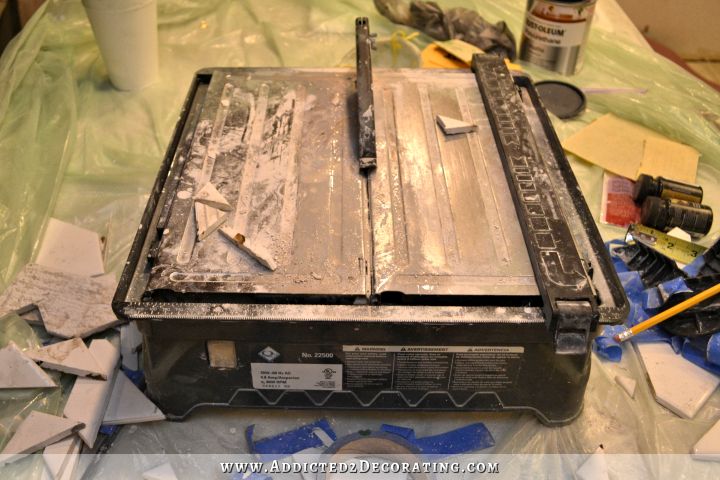
I bought it at Home Depot several years agone (before I did the tile backsplash at the condo), and I remember I paid about $89 for information technology. Obviously it'due south not actually fancy at all, just I've definitely gotten my money'south worth out of it. It has served me well over the years.
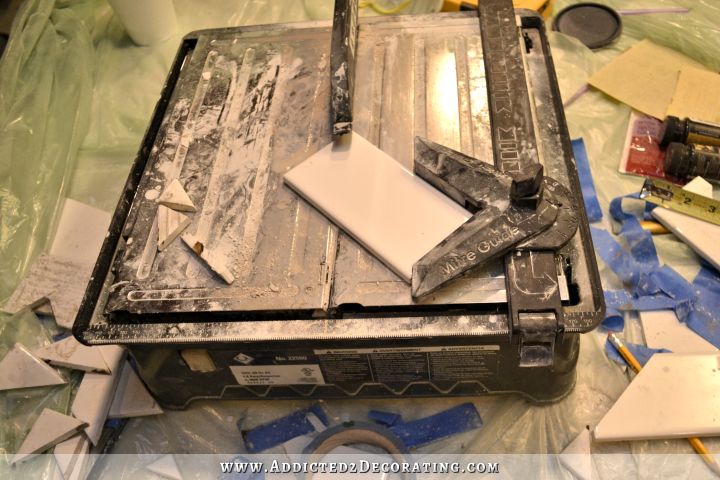
For cutting angles, it has this miter guide that you lot can use to slide the tile through the blade at a certain degree. For the herringbone design that I'thou doing, all of the angle cuts are 45-caste angles .
I failed to take pictures along the mode during this project, but I'll do my best to explicate on my already-in-progress wall. 🙂
How To Install Tile Backsplash
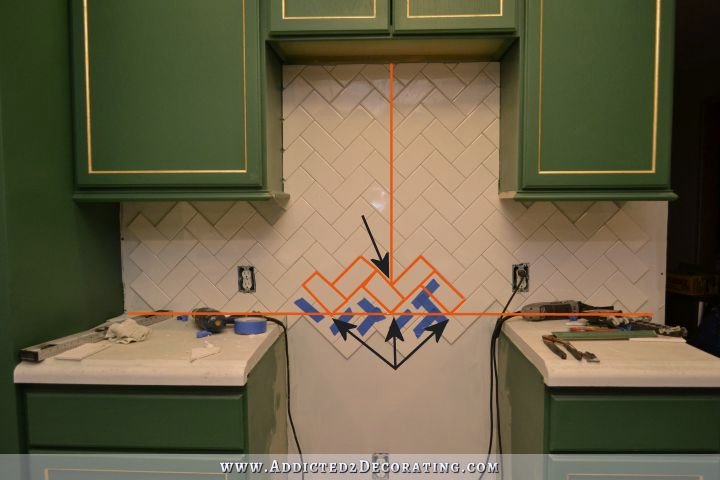
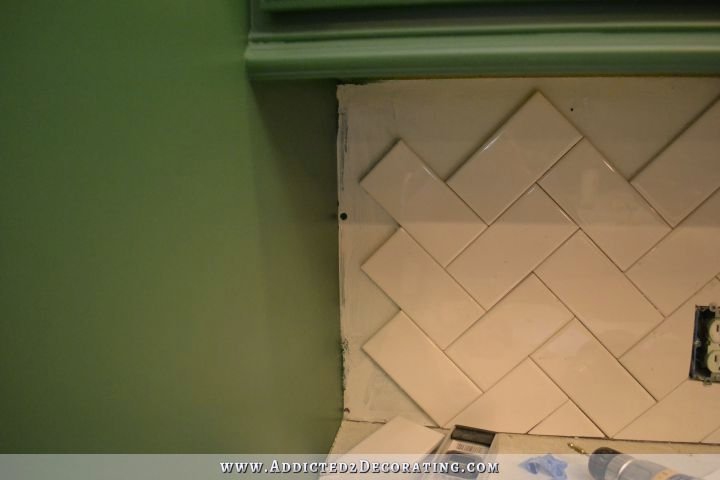
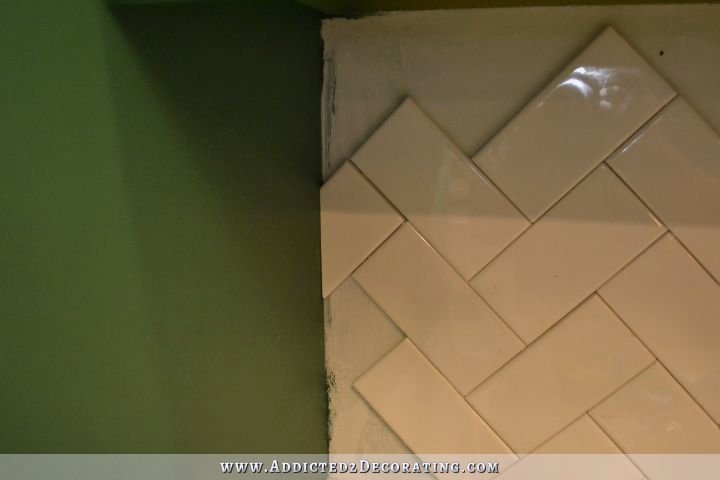
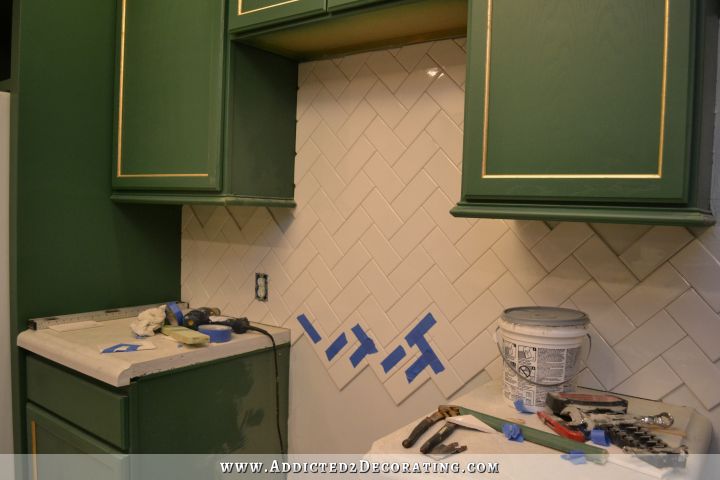
I started this wall past marking a level line about ane/8 inch from the tiptop of the countertop. That space gives some expansion room for the tile, and it'll exist caulked when I'chiliad through with the grouting. And then I too measured and marked a vertical line in the middle of the range opening. (Both lines represented past the orange lines.)

I started installing with this tile outlined below, making certain that the bottom corner met the intersection of both lines. I didn't worry about whether or non it was sitting at a perfect 45-degree angle at this indicate. I just put the tile on the wall and guestimated at the bending for now.

Then I added four more tiles, with a total of three tiles that touched the horizontal guide line. Once again, at this point, I wasn't too concerned with them being at the perfect bending. My simply business concern was that all five tiles were sitting flush with each other. And so I used wide painters tape to tape all five tiles together very tightly (like you run into on the tiles beneath the outlined tile in the photo above).
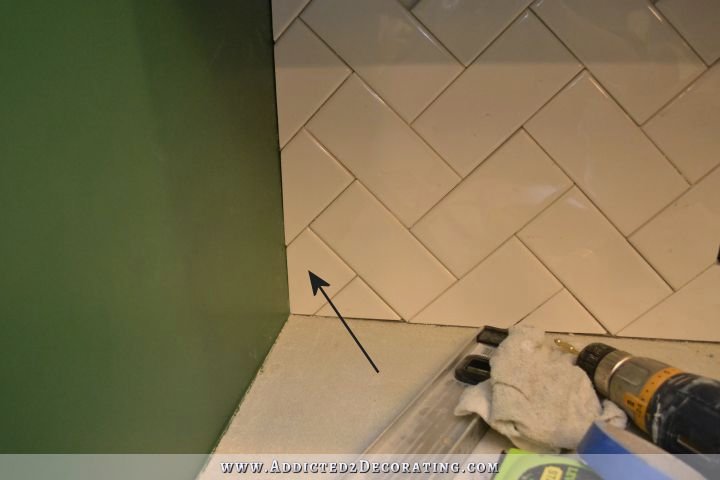
With all 5 tiles taped tightly together, I could and so move the whole section of 5 tiles equally if information technology were one solid piece, and get them perfectly lined upward with the two guide lines that I had drawn. The four points that needed to exist perfectly lined upwardly are shown with arrows pointing to them in the picture beneath.
===
With those kickoff five tiles now perfectly in place, I could add the remainder of that start row of tiles, then I worked out from there.
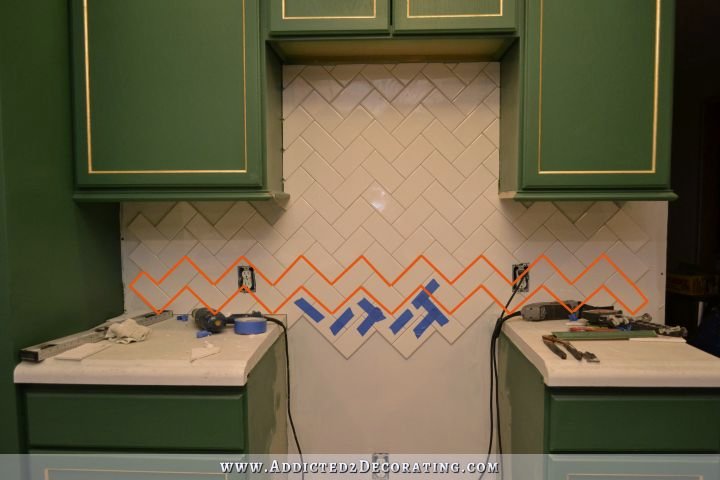
The tiles that needed to exist cut look a little intimidating, simply just proceed in mind that all of the cuts are 45-degree angles. There's no gauge piece of work needed with the angles with this design.
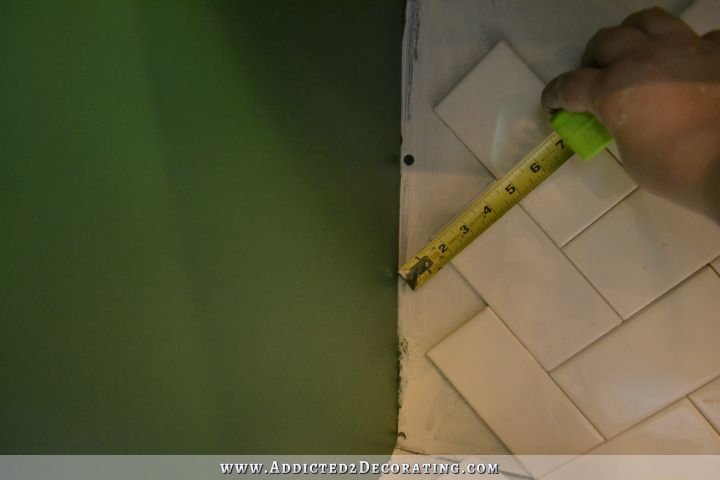
So you can come across here that I needed several cut pieces to go along the refrigerator enclosure.
I started past determining which direction the tile needed to be placed, and then I used my tape measure out to measure the longest edge. For this tile, I had a measurement of iv 5/eight inches.
Then on a tile, I measured iv 5/eight inches…
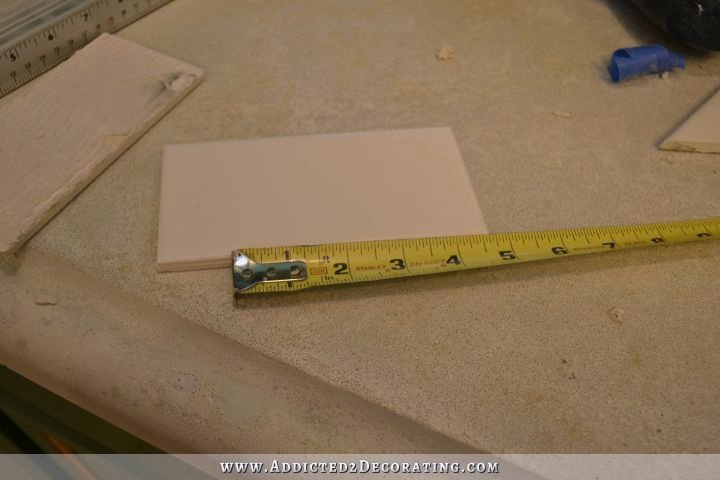
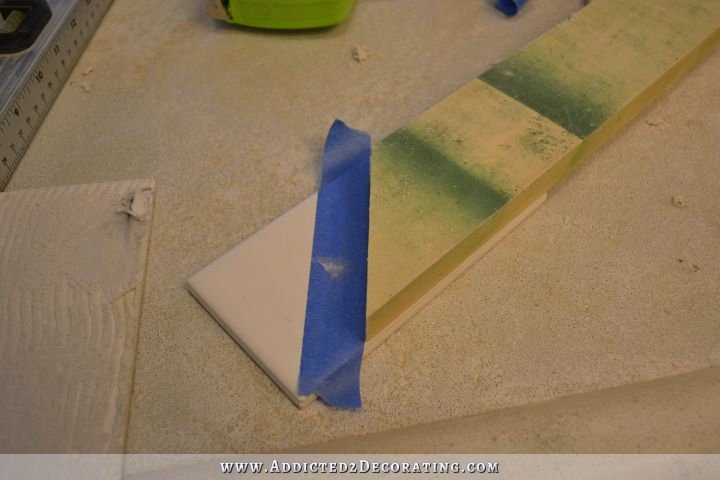
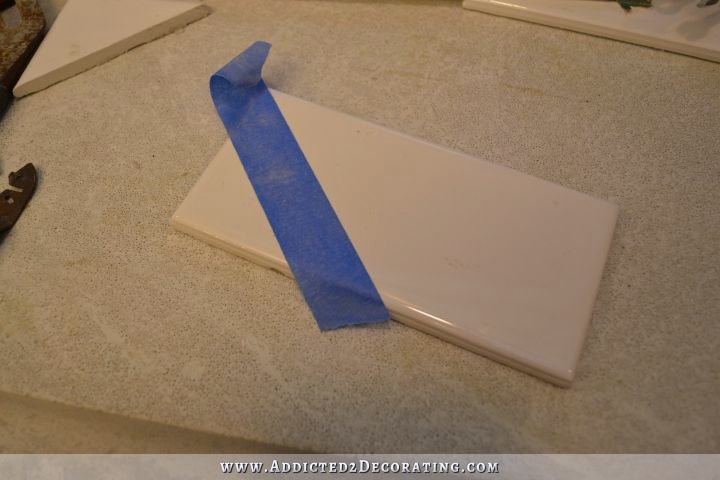
And then I placed a guide lath (cut to a 45-degree angle with my miter saw) on the tile with the point at the iv 5/8-inch mark.
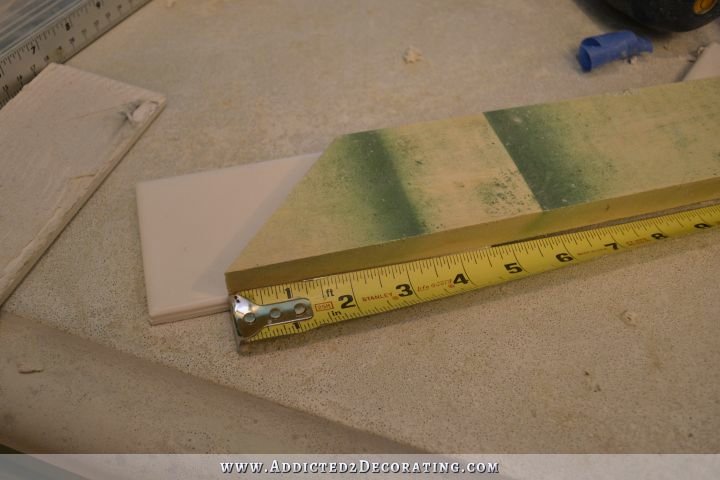
And and so I used a piece of painters record along the border of the board to mark the cut line.
If I merely need one of a sure tile, I'll just employ the tape as a cut guide while using my saw.
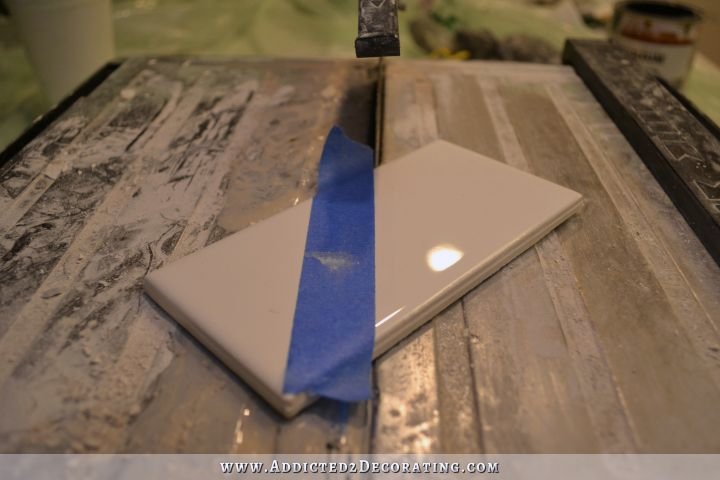
Just in this detail case, I needed three of the aforementioned tile, so I set upward my miter guide to make the cut. That mode I didn't accept to mensurate and tape the other tiles since the miter guide was prepare to the correct measurement.
Of course, after I cut the first tile, I check for the correct fit. If it fits, I tin can go alee and cut the rest. If information technology doesn't fit, I can make the needed adjustments, re-cut the tile, and be sure it fits before cutting the rest.
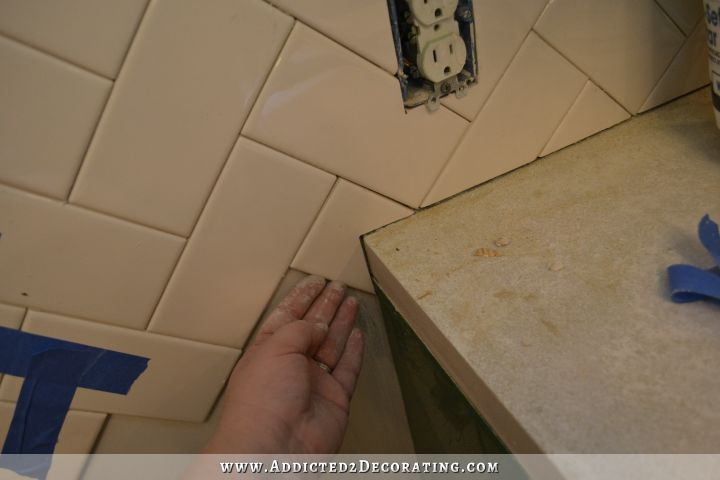
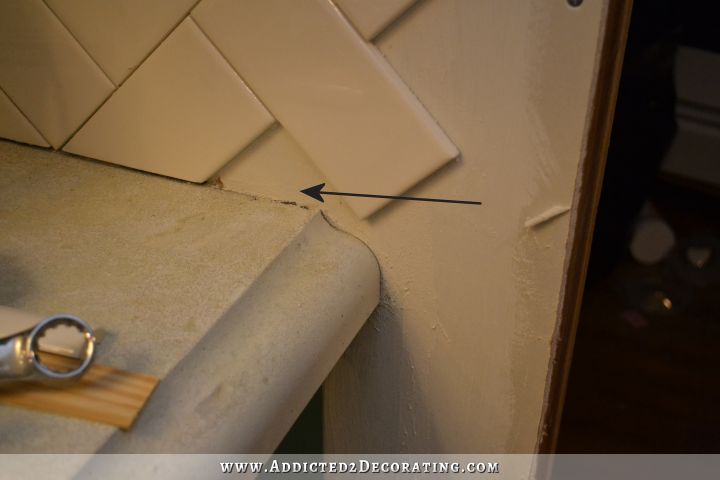
Now hither you'll find that the bottom tile has two cuts — ane along the refrigerator enclosure, and one along the countertop.
While I had my saw set to cutting these tiles forth the countertop, I cut one for the corner as well.
Of course, it didn't fit yet, so I set it aside for the time beingness. Then when I did these tiles forth the refrigerator enclosure, and had the tile saw set to cut that angle, I grabbed the tile that I had ready bated and cut the second angle required for that corner slice.
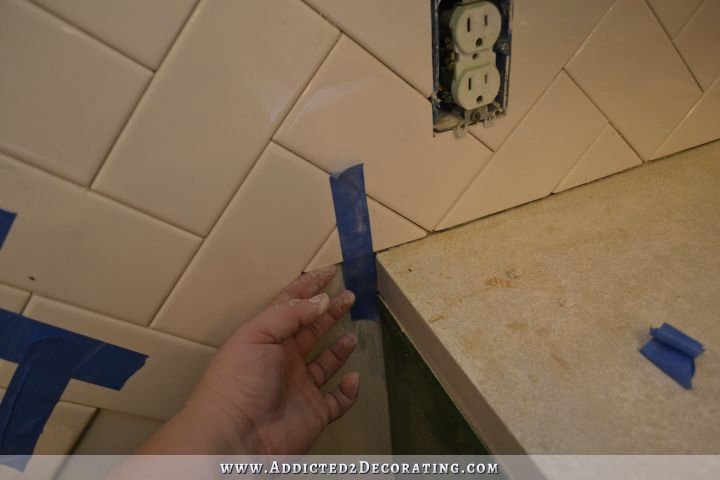
Areas like this tin can be a fleck catchy, but again, they're all 45-degree angles, and it's actually not that bad.
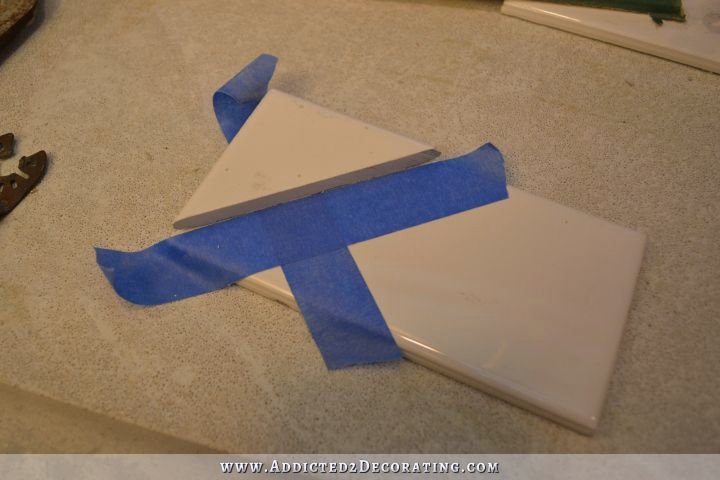
I started past borrowing 1 of the triangle pieces that I had cut for the areas that were along the countertop, and I put it into place.
Then using a long piece of painters tape, I marked the vertical cut line on the tile.
So I placed that triangle with the tape guide on top of a total piece of tile…
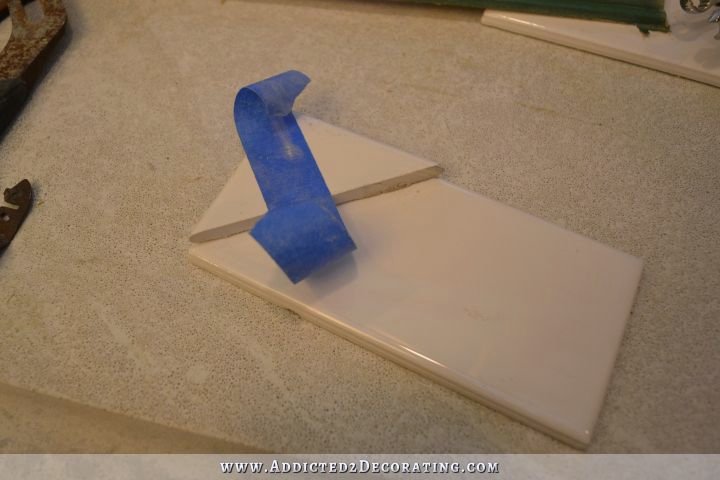
And I advisedly transferred the tape to the full piece of tile, being sure to go along the aforementioned bending.
And then I placed the triangle dorsum on the full tile, and marked the bottom with a piece of tape.
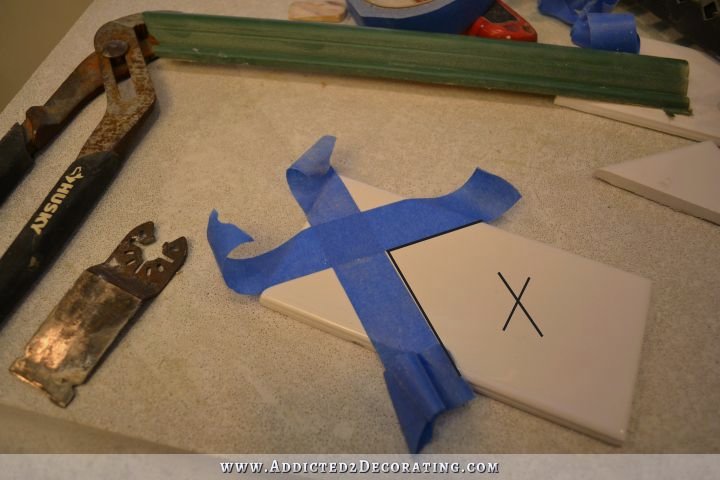
That piece of tape was on the wrong side of the cut line, and then I used another slice of tape to marking the correct side of the cut line.
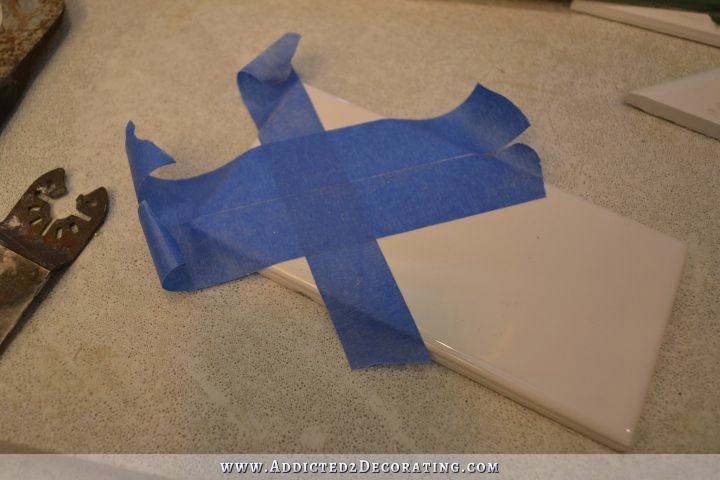
And so removed the first slice of record. That gave me the expanse that needed to be cut away, as you can see outlined below.
And here'south my cut piece…
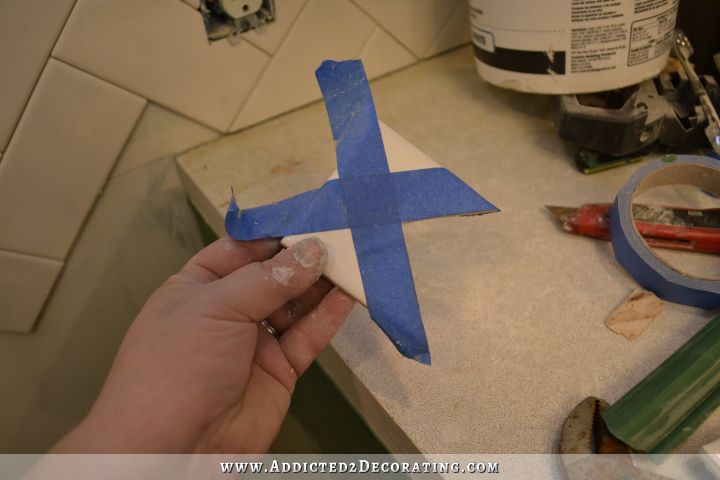
And here it is in place…
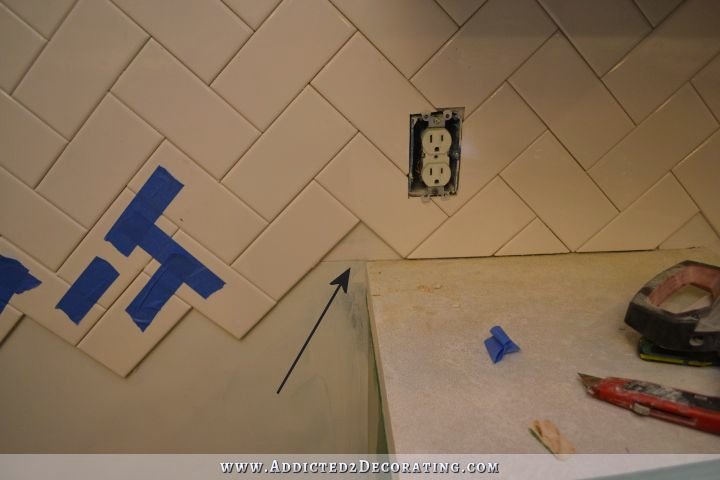
And equally you tin see, once the one difficult piece is in place, the rest of the tiles on that column will simply crave one cut to fit forth the edge of the chiffonier.
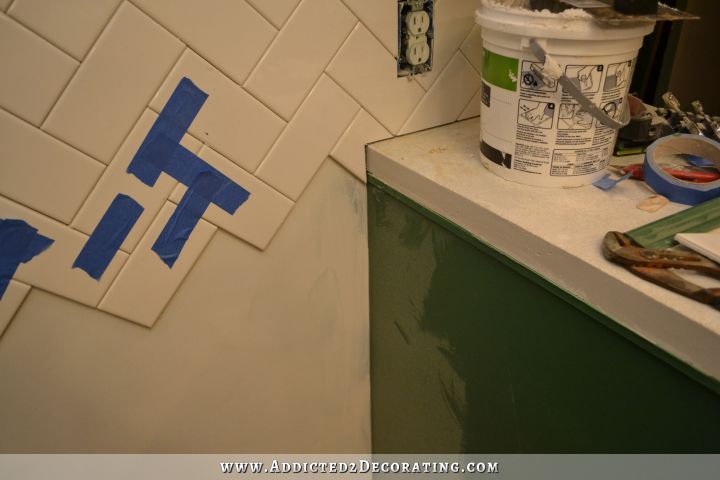
Forgive my dust. I got a bit sidetracked with the floor. 🙂

Anyhow, back to tile…
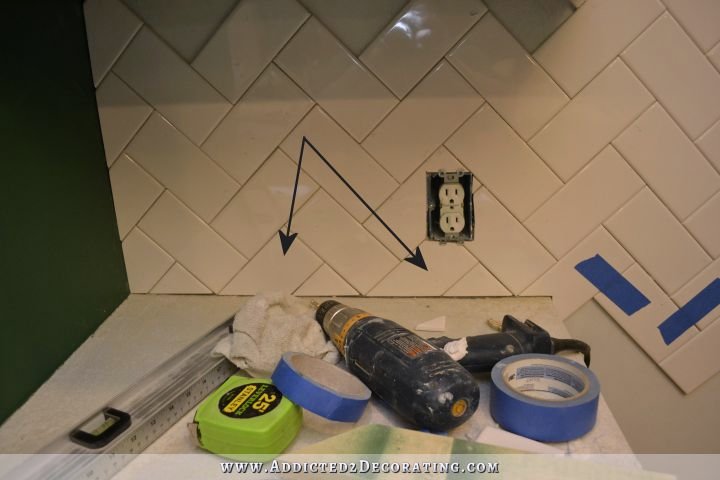
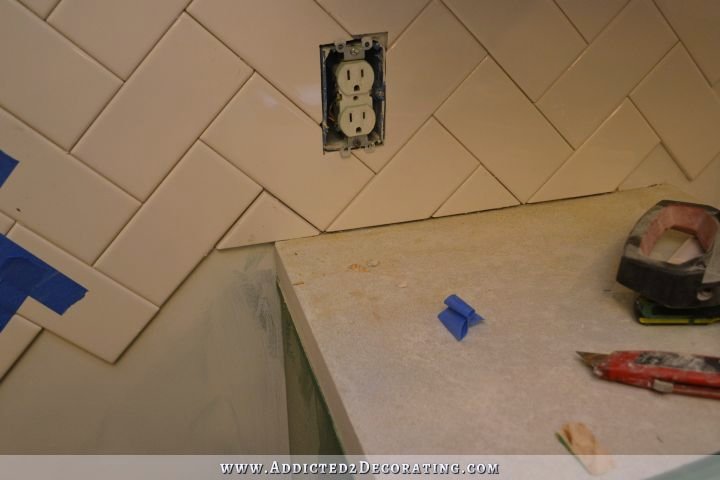
Pieces like this around outlets can also exist catchy.
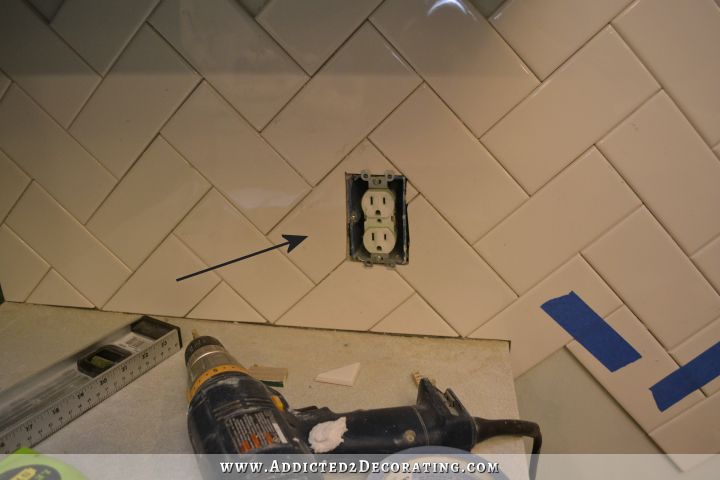
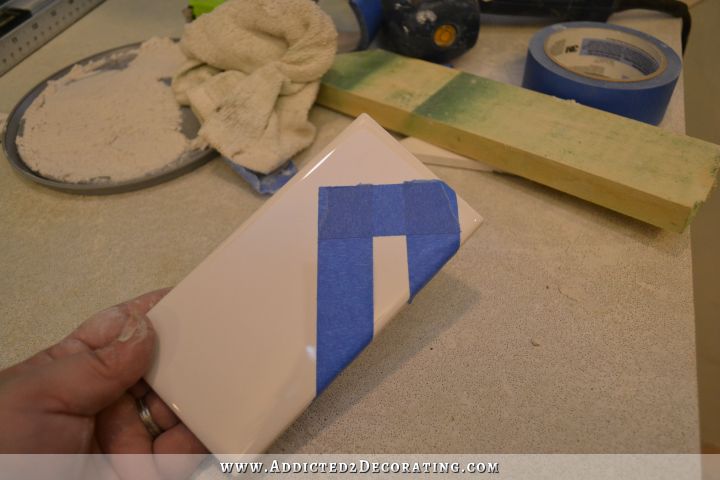
To do that 1, I started by holding a tile in place as best as I could.

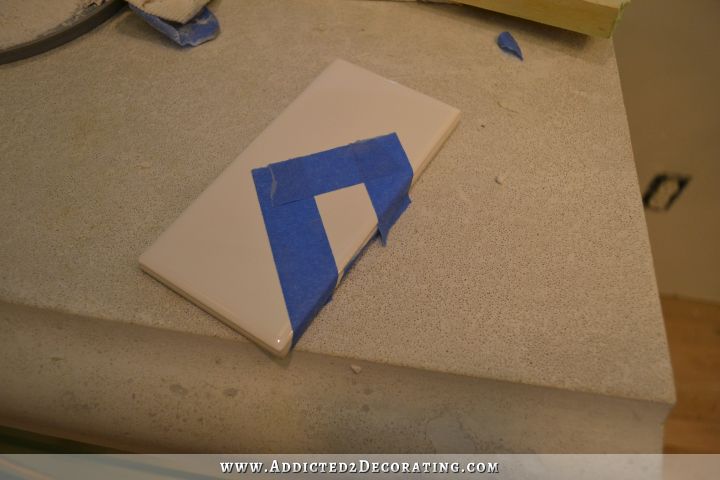
And so I used painters tape and marked the exterior edges of the outlet box. I just eyeballed it equally best as I could.
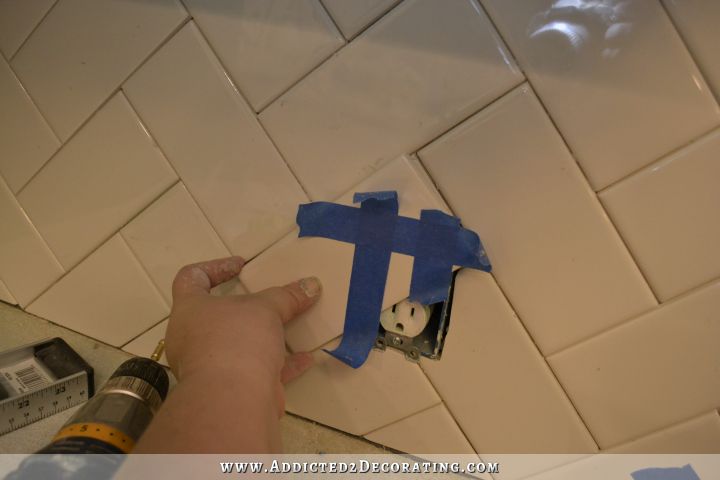
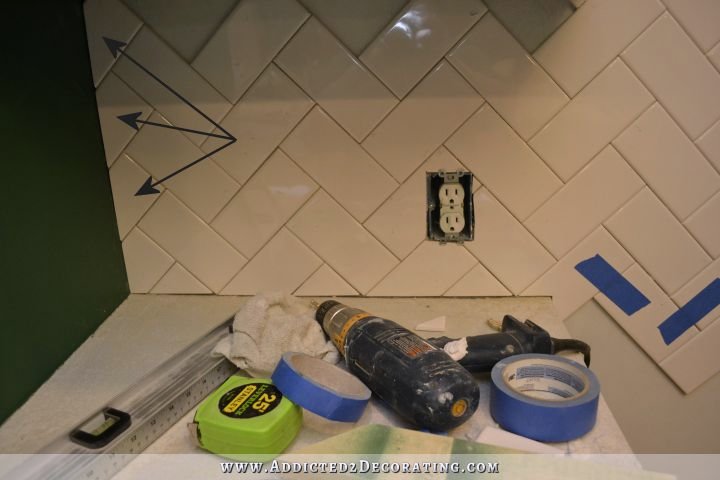
Later on tearing away the excess tape, I could come across the shape of the outlet box, and where I needed to cut. On this particular i, I started past cut off the tiny triangle on the corner, and and then I could hands do the other two cuts.
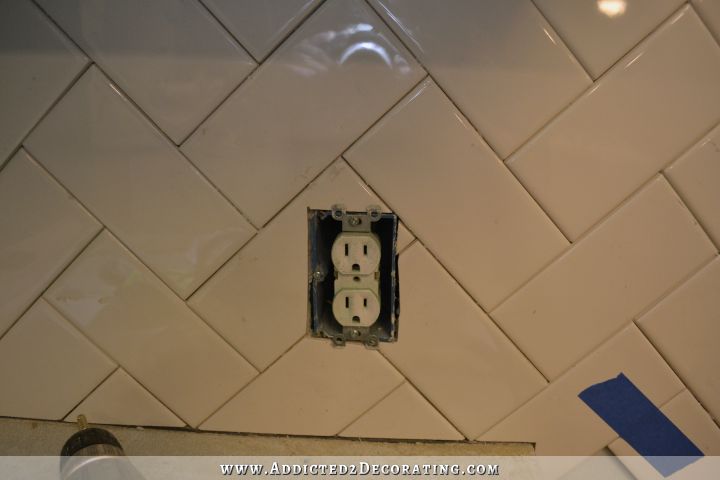
On pieces similar this, I well-nigh never get it perfectly cut on the commencement endeavour. I oft take to take it back to the saw a second and even a tertiary time to shave off a trivial bit more so that it fits perfectly.
And here information technology is in place…
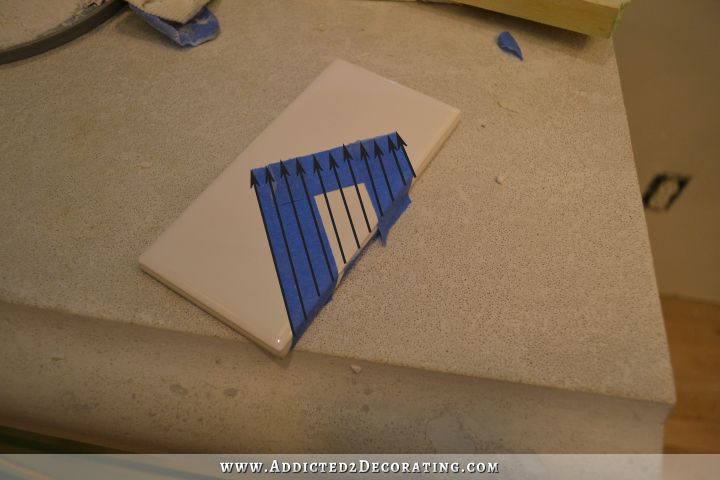
Now if yous have an case where yous accept to cut a section out of the center of a tile similar this…
You accomplish that past cut the 2 outside edges, and then making a serial of cuts very close to each other until all of the middle section is removed.
That's the aforementioned method I'm going to take to use in society to cut this piece that wraps effectually the ogee edge on my countertop. I'll have to brand a template of the design, transfer that template to the tile somehow, and so apply that method I showed you in a higher place to cut out the design.
And then those are the basics on tiling a herringbone backsplash.
Ane word of advice. While my inexpensive tile saw actually has served me well over the years, I wouldn't advise getting the absolute cheapest saw available. I'd personally honey to get a new one, and while I still don't use a tile saw enough to justify spending several hundred dollars on one, I would like to take i like this.
I'll exist back on Monday, and I'll definitely have this wall finished by and then. 🙂

Addicted 2 Decorating is where I share my DIY and decorating journey as I remodel and decorate the 1948 fixer upper that my husband, Matt, and I bought in 2022. Matt has M.South. and is unable to do physical work, so I practice the majority of the work on the house by myself. Y'all can acquire more most me here.
I hope y'all'll bring together me on my DIY and decorating journey! If y'all want to follow my projects and progress, you lot tin subscribe beneath and have each new post delivered to your email inbox. That fashion you'll never miss a thing!

Source: https://www.addicted2decorating.com/how-to-install-a-herringbone-subway-tile-backsplash.html
Posted by: porterdisper.blogspot.com
0 Response to "How To Install Herringbone Backsplash Sheets"
Post a Comment